


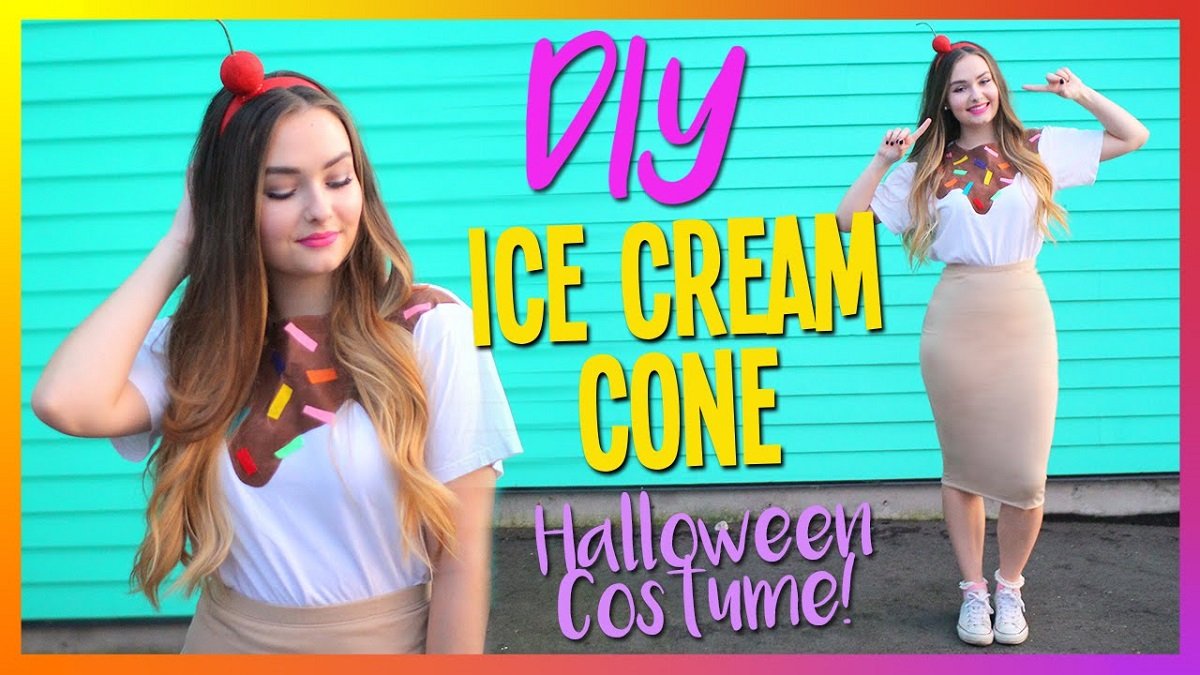
As summer days approach and festive events call for creative attire, nothing beats the charm of a DIY ice cream cone costume. This whimsical outfit is not only a hit at themed parties but also a delightful project for families to work on together. In this guide, we’ll walk you through every step of making your own ice cream cone costume, from the initial planning to the final touches. Let’s dive into the world of crafting a costume that’s as fun to make as it is to wear.
Why Choose an Ice Cream Cone Costume?
An ice cream cone costume offers several advantages. First and foremost, it’s a universally loved theme that appeals to all ages. The combination of bright colors and playful elements makes it an excellent choice for parties, Halloween, or even themed school events. Additionally, creating this costume allows for a high degree of personalization. Whether you prefer a classic vanilla cone or a more adventurous mint chocolate chip, you can tailor your design to match your favorite flavor.
Materials and Tools
Before you start crafting, it’s crucial to gather all the necessary materials. Here’s a comprehensive list to help you prepare:
- Cardboard or Foam Board: For the cone structure.
- Fabric: Felt or cotton fabric in colors matching your chosen ice cream flavor and cone.
- Hot Glue Gun and Glue Sticks: For attaching various parts of the costume.
- Scissors: For cutting fabric and cardboard.
- Craft Paint: To add details and colors to the cone and ice cream sections.
- Elastic Bands: To secure the costume in place.
- Sponge or Foam: For creating the fluffy texture of the ice cream scoop.
- Markers or Paint Pens: For adding intricate designs and details.
- Needle and Thread: For sewing parts of the costume, if needed.
- Optional: Felt or Craft Foam: For additional decoration like sprinkles or cherries.
Designing Your Ice Cream Cone
Create a Template
Start by designing your diy ice cream cone costume. Sketch out your idea on paper, considering the size and shape that will fit comfortably on your body. A traditional ice cream cone typically includes a cone shape for the base and a round, fluffy top representing the ice cream scoop.
Cut Out the Cone Shape
Use cardboard or foam board to cut out the cone shape. The cone should be large enough to fit comfortably around your torso. Measure and cut a piece of cardboard into a large triangle, then roll it into a cone shape and secure it with tape or glue. Trim the top edge to ensure it’s even.
Prepare the Ice Cream Scoop
For the ice cream scoop, use foam or sponge to create a rounded shape. Cut the foam into a large circle and then mold it into a scoop shape. You can glue or sew this onto the top of the cone.
Assembling the Cone and Scoop
Cover the Cone
Wrap your cardboard or foam cone in fabric to give it a more finished look. Use a light brown fabric for the cone’s traditional color and secure it with a hot glue gun. Ensure the fabric is smooth and tightly fitted around the cone.
Decorate the Cone
Add texture to your cone to mimic the classic waffle pattern. You can paint or draw lines onto the fabric to create a realistic appearance. Alternatively, you can glue on a lattice of brown felt or fabric to simulate the waffle texture.
Attach the Ice Cream Scoop
Once your cone is covered and decorated, it’s time to attach the ice cream scoop. Glue the foam scoop securely onto the top of the cone. If you want to add additional texture, use fluffy fabric or batting around the scoop to make it look more realistic.
Adding Details and Personalization
Create Ice Cream Flavors
Personalize your ice cream scoop by adding color. Use fabric paint or markers to create designs representing your favorite flavors. For a classic look, you might use white or pastel colors, but feel free to get creative with vibrant hues.
Add Fun Toppings
To make your ice cream cone even more exciting, consider adding faux toppings. Cut out small pieces of red felt or foam to make a cherry, and attach it to the top of the scoop. For sprinkles, use colorful beads or fabric scraps glued on the scoop.
Accessorize
Add any additional accessories to enhance your costume. A felt or foam waffle cone hat, matching gloves, or even a pair of themed shoes can complete your look. Consider creating an ice cream-themed purse or prop to carry with your costume.
Tips for a Successful DIY Project
- Plan Ahead: Outline your design and gather materials before starting. This will save time and ensure you have everything you need.
- Involve Others: This project can be a fun family or group activity. Assign different tasks to family members or friends to make the process more enjoyable.
- Test Fit: Always try on the costume during the making process to ensure proper fit and comfort.
- Be Creative: Don’t be afraid to add your unique flair to the costume. Personal touches make the final result even more special.
- Safety First: If using sharp tools or hot glue, exercise caution and supervise children if they are participating in the crafting process.
Conclusion
Creating a DIY ice cream cone costume is a delightful and rewarding project that results in a fun and eye-catching outfit. From gathering materials to adding final touches, each step in the process contributes to a unique and memorable costume. Whether you’re preparing for a party, a parade, or just a day of creative fun, this costume is sure to be a hit. So gather your materials, unleash your creativity, and enjoy crafting a costume that’s as sweet as the treat it represents.